Ever tried bending wire by hand to make a pair of earrings? One loop comes out round. The other looks oval. You sigh and start over. Wire jigs fix that mess fast. These simple tools let you wrap wire around pegs on a board. Every shape matches perfectly.
You get speed and no fancy skills needed. Beginners make loops, links, or hearts that look pro. This guide shows you everything. You’ll learn what a wire jig does. You’ll pick the right one. Then follow steps to wrap wire right. Plus tips, fixes, and starter projects.
By the end, you’ll create consistent shapes anyone can wear or sell. Let’s jump in.
Why a Wire Jig Makes Perfect Shapes Easy for Beginners
Wire jigs beat freehand bending every time. You place pegs in a board’s holes. Then wrap wire around them. Loops stay the same size. Curves match exactly. No more uneven pairs.
Think of it like cookie cutters for wire. Freehand work twists and kinks. A jig holds everything steady. You save time too. One setup makes dozens of shapes.
Jewelry makers love them for chain links or ear wires. Speed comes first for beginners. Then consistency builds confidence.
Popular in earrings or bracelets. WigJig tools show real examples. Check their site for ideas.
Key Parts of a Wire Jig and How They Help You
Most jigs start with a flat base board. Holes let you insert pegs anywhere. Pegs come straight or bent. Sizes range from 3mm to 12mm.
Small pegs make tiny loops for beads. Larger ones form big hoops. Rods add straight sections. Clamps hold wire in place sometimes.
Peg size sets your shape’s curve. Spacing controls the overall size. You swap pegs for new designs. Every wrap matches because the setup stays fixed.
This means pairs like necklace drops look identical. No eyeballing bends.
Basic wire jig parts ready for use.
How to Pick Your First Wire Jig Without Buyer’s Remorse
Start with needs in mind. Basic peg boards work best. WigJig Electra leads packs for ease. It has 40 holes and peg sets.
Look for 20-plus pegs. Sizes from 1/8 inch to 1/2 inch cover most shapes. Wood or thick plastic bases last longer. Skip flimsy metal that bends.
Budget hits $20 to $50. Kits often include wire samples. Check reviews on sites like Amazon’s top wire jigs. Durability wins over price.
Peg spacing matters for big curves. Tight grids suit small work. Test if possible. Avoid cheap copies. Pegs snap easy.
Top Features That Make a Jig Beginner-Proof
Numbered holes speed setup. You align pegs without guesswork. Color-coded pegs match sizes quick.
Non-slip bases stay put on tables. Storage slots keep parts together. Starter kits add cutters or pliers.
These cut frustration. You focus on wrapping, not hunting tools.
Step-by-Step: Wrap Wire into Matching Shapes on Your Jig
Gather supplies first. Use 20-24 gauge dead soft wire. Copper or sterling works. Grab flush cutters, chain nose pliers, and eye protection.
Safety comes first. Wires snap sometimes.
- Pick pegs for your shape. Insert into board holes.
- Straighten a 6-inch wire piece. Anchor one end with pliers or clamp.
- Hold wire taut. Wrap around first peg. Keep even tension. No gaps.
- Loop full circles. Move to next peg smooth.
- Trim excess with cutters. Bend ends in with pliers.
- Remove shape. Repeat for matches.
Practice on scrap. Tension matters most.
Wrapping a basic loop step by step.
Mastering Tension and Wraps for Flawless Results
Pull wire firm but gentle. Too loose? Gaps form. Too tight? Kinks appear.
Wrap clockwise always. Start bends with pliers tips. Full wraps make strong loops.
Scrap wire lets you test. Feel the pull build muscle memory.
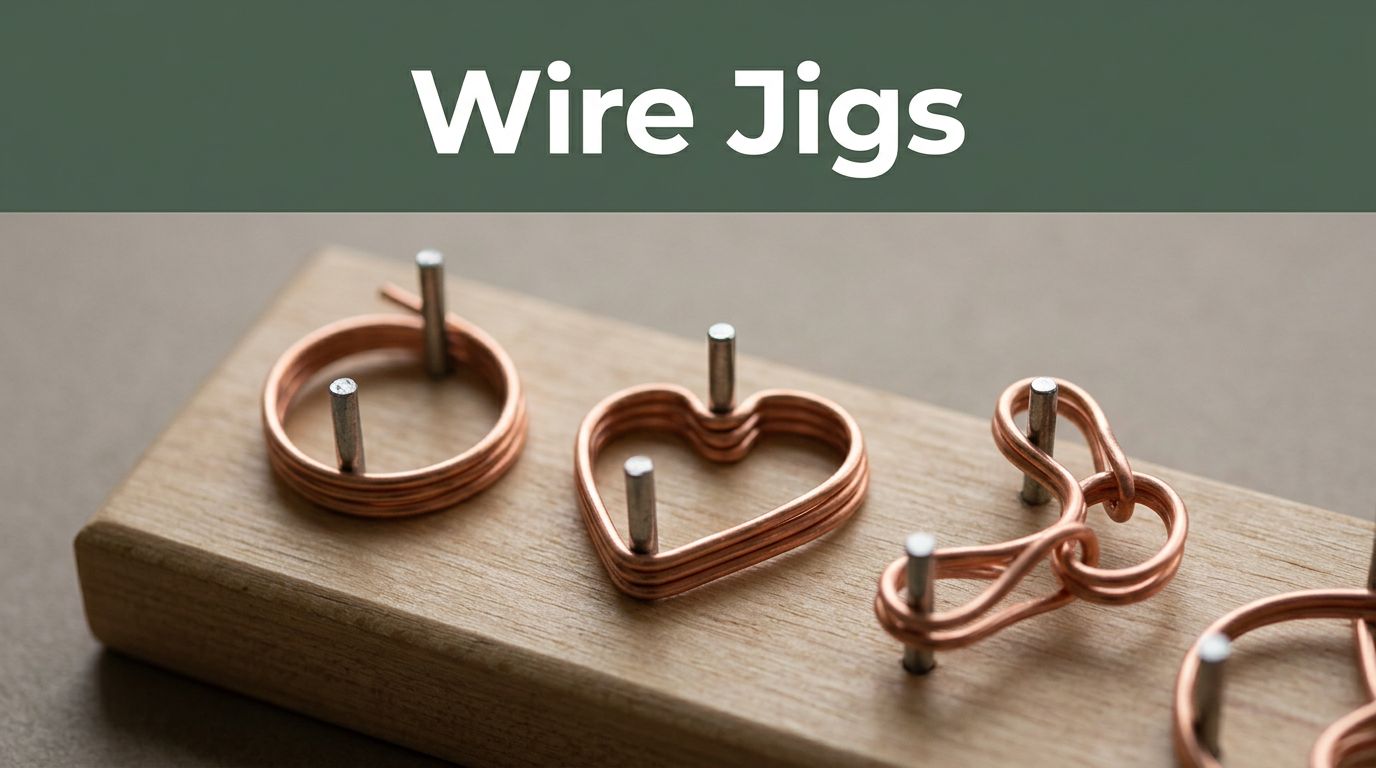
Trying Advanced Shapes Like Hearts or Links
Hearts need four pegs. Place two close for top curves. Two wider below. Wrap outer path first.
S-hooks use two straight pegs. Offset them. Curve wire between.
Links form with three pegs in a row. Wrap half circles. Connect ends later.
Describe setups on paper. Reuse favorites.
Dodge These Beginner Mistakes and Pro Tips to Shine
Loose wraps leave sloppy gaps. Thick wire snaps pegs. Stiff wire fights bends.
Anneal first. Heat with torch lightly. Softens it up.
Practice each shape 10 times. Clean pegs after sessions. Store in bags.
Mark good setups with tape. Hammer shapes flat after for strength.
Scale to custom rings or clasps. Jewelry tutorials on Beadaholique expand ideas.
Quick Fixes for Wonky Shapes and Wire Snaps
Wonky? Re-straighten wire flat. Adjust peg height even.
Tight curves? Switch thinner gauge. Snaps mean too stiff. Anneal again.
Patience pays. Hands learn fast.
Starter Projects to Show Off Your Consistent Wire Skills
Hoop earrings shine first. Use 2mm pegs. Wrap 3-inch wire. Add beads. 30 minutes per pair.
Chain necklace links next. 5mm pegs in rows. Hammer flat. Link 20 pieces. One hour total.
Beaded drop pendants finish strong. Eye pin setup. Hang crystal. 20 minutes.
These sell quick on Etsy. Match steps above. Tweak sizes your way.
Perfect hoop earrings from jig wraps.
Wire jigs turn frustration into fun. You make matching shapes fast. No skills needed at start.
Grab one today. Try hoop earrings. Share your first pair in comments. Subscribe for more tips.
Anyone crafts pro jewelry now. Your turn starts here.