You string a stunning necklace with sparkling beads and smooth wire. Then those ugly crimp beads poke out at the ends. They make your handmade piece look cheap and amateur, even if the rest shines.
Crimp beads secure clasps on beading wire. You squeeze them tight to hold everything in place without knots. But the bulges show, ruining the flow.
Crimp covers fix that fast. These tiny metal pieces fold over crimps for a seamless look. Your jewelry fools everyone into thinking it came from a high-end shop. This guide walks you through steps, tools, and tips. You’ll get pro results on bracelets, necklaces, or earrings. Imagine the confidence of wearing pieces that turn heads.
Why Hide Crimp Beads and What Crimp Covers Do Best
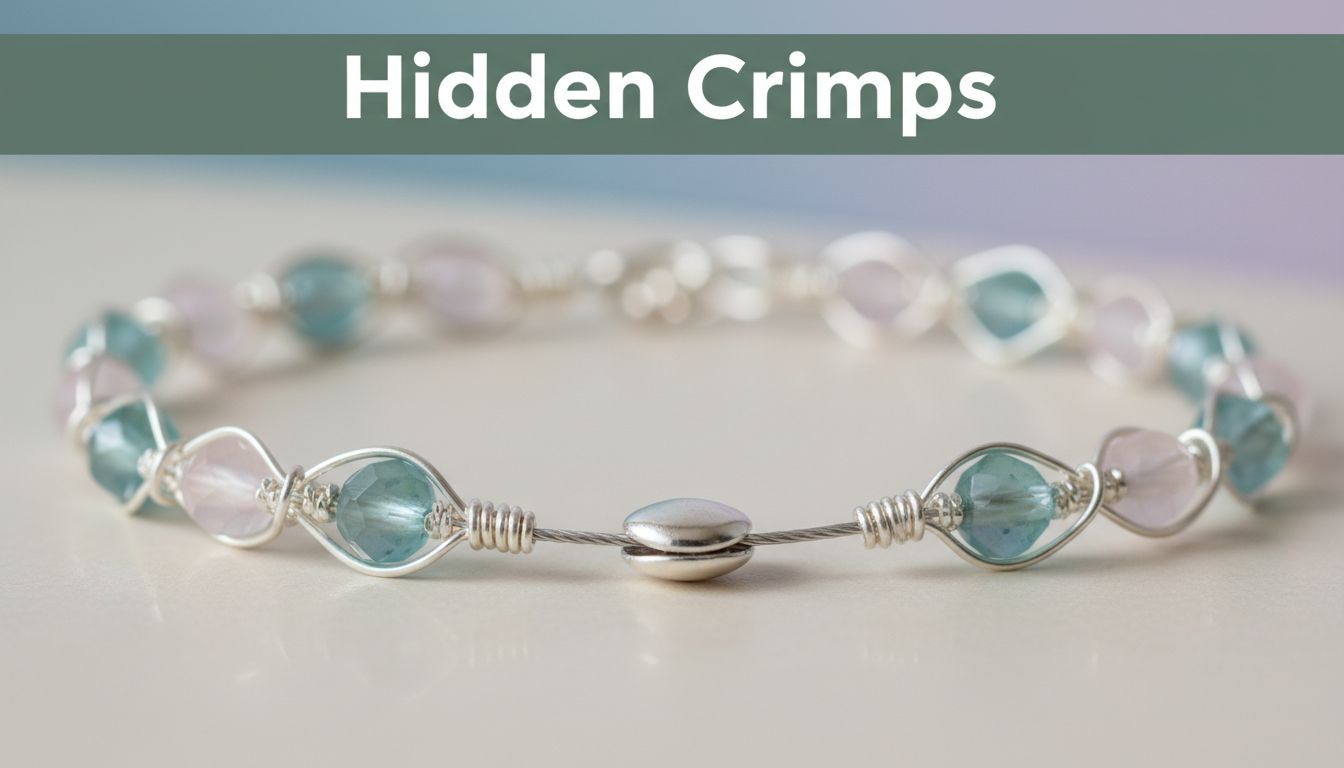
Crimp beads are small metal tubes. You crush them with pliers to grip wire and clasps. They work well for strength. However, the flattened shape sticks out. It clashes with delicate beads and catches light wrong.
That’s where crimp covers come in. They slip over the crimp like a tiny clamshell. You close them with pliers for a smooth dome or tube. Now the end blends right into your design.
You’ll find covers in round or tube styles. Round ones mimic pearls best. Tube shapes suit longer crimps. Pick gold-plated for warm tones or silver for cool ones. Match your clasp metal to avoid odd shines.
These covers add durability too. No glue means less mess and failure. They hold up to daily wear. Plus, you can practice on scraps since they are cheap. Size matters most. Match the cover to your wire gauge, like 2mm for .019-inch wire. Test fit before buying lots.
In short, covers turn flaws into features. Your ends look intentional and boutique-quality.
Stock Up on These Must-Have Supplies for Flawless Crimps
Gather tools first. Start with beading wire, such as .019-inch soft flex. It stays flexible yet strong. Get crimp beads slightly larger, like .020-inch, for a snug hold.
Next, grab crimp covers in 2mm or 3mm sizes. Buy 20 of each for a starter bracelet. Crimping pliers shape the bead perfect. The two notches fold then flatten it.
You’ll need chain-nose pliers too. They close covers without scratching. Wire cutters trim ends clean. For one bracelet, plan one foot of wire, 20 crimps, and 20 covers.
Match metals across all pieces. Gold wire pairs with gold crimps and covers. This prevents tarnish clashes over time. Nice extras include a bead mat. It stops beads from rolling away. A magnifier helps with tiny parts.
Shop at craft stores or bead sites. Quality tools last. Cheap pliers slip and frustrate. A full starter set costs under $20. That investment pays off quick.
Stock smart. Buy multi-packs for practice. Then dive into making.
Nail the Process: Easy Steps to Cover Crimps Like a Pro
The full process takes under five minutes per end. Practice builds speed. Handle wire gentle to avoid pokes. Stay patient your first try.
Step 1: Slide Crimp Bead and Crimp Securely in Place
Thread wire end through your clasp loop. Slide a crimp bead back down close to the clasp. Pull wire snug.
Use crimping pliers. First notch folds the crimp in half over the wire. Second notch squeezes it flat into a smooth oval. Avoid the cutter notch, it weakens.
Tug hard to test. The clasp shouldn’t budge. Trim excess wire. Leave just 1/8 inch. It hides inside later. Over-crimping snaps wire, so squeeze firm but even.
Step 2: Position and Snap the Crimp Cover Over It
Slide a crimp cover over the crimped bead. Open side faces the crimp. Position it tight against the clasp.
Grab chain-nose pliers. Hold the cover steady. Gently pinch edges together like closing a pea pod. They meet flush.
Roll it between fingers. This rounds the shape natural. Check for gaps. The crimp stays hidden inside. If it sticks, tap plier tips light.
Step 3: Repeat on the Other End and Check Your Masterpiece
String beads now or after one end. Symmetry looks best. Repeat crimp and cover on the finish clasp.
Trim any wire poke-out flush. Drape the piece over your neck. Inspect shine and flow from all angles.
Polish with a soft cloth if fingerprints show. Snap photos of your work. Share progress online for feedback.
Your ends gleam seamless now.
Dodge These Mistakes and Unlock Expert Tricks for Shine
Newbies pick wrong sizes often. A too-big cover slips off. Too small won’t close. Measure your crimped bead first. Buy samples in packs.
Dull pliers leave loose crimps. Test each squeeze on scrap. Sharpen or replace as needed.
Color mismatch draws eyes to ends. Gold covers on silver wire scream DIY. Always coordinate.
Fixes stay simple. Practice on a scrap strand. Buy multi-metal sets for options.
Pro tricks elevate your game. Use covers on memory wire ends. They cap rough cuts smooth. Try them over macrame knots too.
For stubborn covers, warm with a lighter quick. Hold distant and safe. It softens metal slight.
Layer two covers on thick crimps. The double dome hides bulk.
Project ideas spark fun. Build multi-strand bracelets. Hidden crimps let strands shine free. Add to earrings for dainty drops.
Avoid frustration. Practice pays. Your tricks build with time.
Crimp covers transform ends from eyesores to assets. Follow the three steps: crimp secure, snap cover, check both sides. Top tip? Match sizes and metals always.
Grab supplies today. Make one bracelet now. Tweak for your style next.
Share your before-and-after pics in comments. Pin this for later crafts. Subscribe for more jewelry tips. Your creations deserve the spotlight.