You pull out that old pearl necklace from a drawer. It’s in pieces after years of storage. The clasp broke long ago, and pearls scatter everywhere. Don’t toss it. You can fix it yourself and save money over a jeweler’s fee.
Restringing at home keeps the sentimental value intact. It costs under $20 in supplies. Plus, you gain confidence in a simple craft. No special skills required. This process takes about an hour. You’ll follow easy steps for beginner pearl restringing. Let’s gather your supplies first.
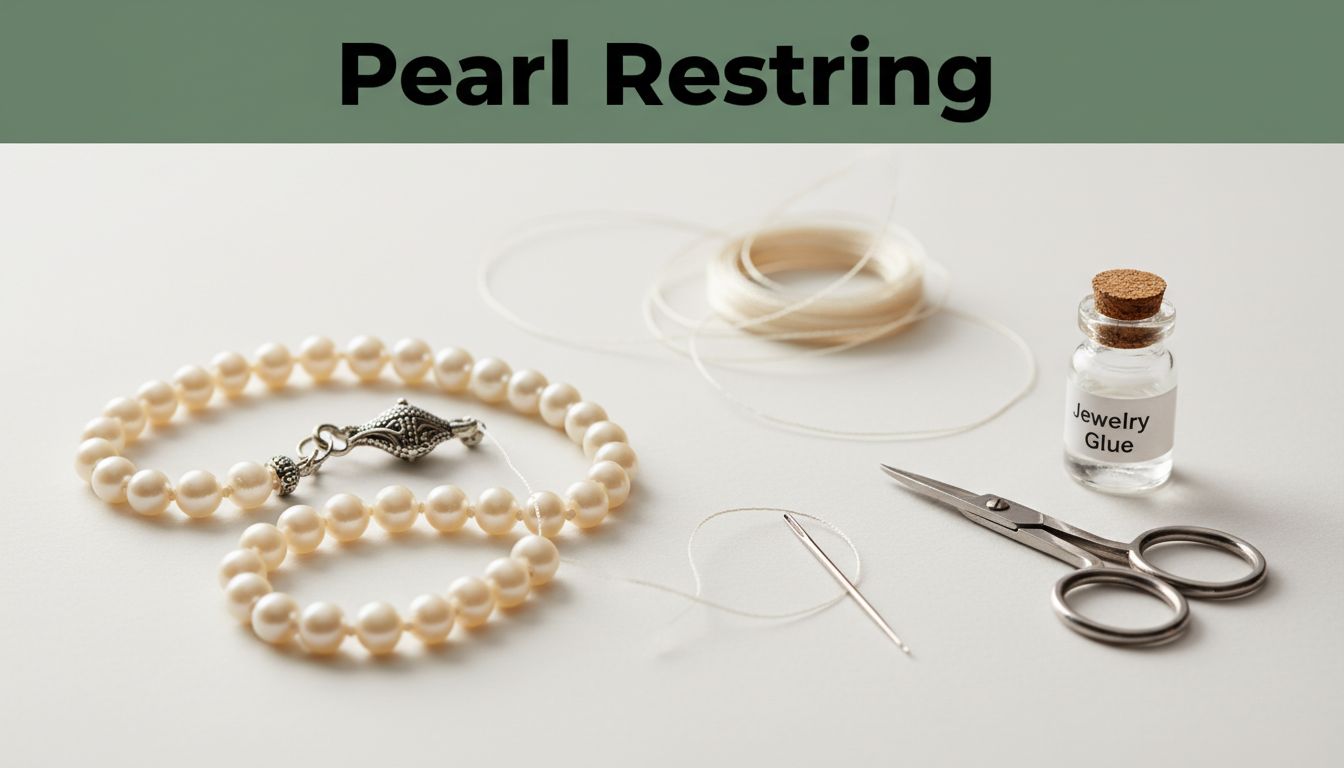
Round Up the Right Tools and Materials Before Diving In
Start with the basics to avoid mid-project trips to the store. You need 2-3 yards of size 2 or 4 silk thread. Match it to your pearl holes for smooth threading. Grab a thin beading needle that slips through easily.
Pick up sharp small scissors for clean cuts. Get a matching clasp or French wire guardian. An optional knotting awl or tweezers helps tighten knots. Add beeswax to condition the thread. You’ll also want jeweler’s glue and a pearl board or soft cloth.
These items run under $20 at craft stores or online. Knots between pearls matter most. They stop all beads from spilling if the strand snaps again. Test thread strength first. Stretch it hard. It should hold without fraying.
Choose Thread and Needles That Fit Your Pearls Perfectly
Measure pearl drill holes with a toothpick. Size 2 silk works for small holes. Size 4 suits larger ones. Silk beats nylon because it drapes naturally on pearls and resists stretching.
Wax the thread before use. It glides through beads and lasts longer. Practice on one pearl now. Thread the needle, pass through the hole, and pull smooth. This quick test prevents frustration later. In short, right sizes mean fewer headaches.
Prep Your Workspace and Sort Those Loose Pearls
Clear a soft table with good light. Lay down a towel to catch stray pearls. A pearl board with holes keeps them sorted by size and shape. This setup stops losses during work.
Gentle cleaning comes next. Use mild soap and a soft brush. Rinse well and dry completely. Inspect for damage as you go. Even spacing makes the necklace look pro.
Clean and Inspect Each Pearl for Hidden Issues
Sort pearls into piles by size. Wash in lukewarm soapy water. Rinse under cool flow. Pat dry with a microfiber cloth.
Check each for chips or loose drills. Discard damaged ones. Note spots for replacements. Count total pearls to match original length. For example, a 16-inch strand needs about 40-50 beads. This step ensures a flawless result.
Practice the Easy Overhand Knot That Protects Every Pearl
Master the overhand knot first. It sits snug against each pearl. Thread the pearl. Pinch the threads on both sides. Form a loop like tying your shoes.
Pass the end through the loop. Pull tight with an awl or tweezers. One knot per pearl interval protects the whole strand. Practice builds speed. Use scrap thread and cheap beads. Your hands remember the motion fast.
Tie Your First Practice Knots Without Stress
Hold thread taut between fingers. Position the pearl at knot spot. Make the loop close to the bead.
Slide the awl through. Tug ends to snug it home. Loose knots? Pull harder next time. This simple fix works every round. As a result, a single break loses just one pearl.
String and Knot the Full Necklace from Start to End
Wax your thread and attach the needle. String the first half. Leave a 4-inch tail for the clasp. Knot after each pearl as you go toward the center.
Add a center piece if your design has one. Reverse for the second half. Lay the strand flat often. Check even tension. Aim for 16-18 inches. Adjust later if needed.
Start Strong with the End Loop and First Pearls
Tie a temporary overhand knot at the start. Form an end loop. Thread 5-10 pearls. Knot each one tight.
Drape on your neck. Test the length. Add or remove as needed. This early check saves rework.
Finish the Strand and Tie Off Securely
Reach the last pearl. Make a double overhand knot. Trim excess thread close. Dab on jeweler’s glue.
Repeat at the other end. Let it set for a few minutes. Your strand holds firm now.
Attach the Clasp and Give It the Final Polish
Crimp or glue the clasp to both ends. Use chain nose pliers gently. Screw clasps twist on secure. Fold-over types need careful crimps.
Test by pulling hard. Trim stray threads. Buff pearls with a soft cloth. For custom length, add or subtract beads before final knots.
Secure Your Clasp So It Never Comes Loose
Slide the clasp over the end loop. Crimp with pliers in small bites. Apply glue inside for extra hold.
Wait 24 hours before wearing. This prevents slips. Most importantly, it matches pro work.
Smart Tips to Avoid Beginner Blunders and Make It Last
Pull knots tighter from the start. Wrong thread size blocks beads. Wax always to stop fraying. Keep tension even for smooth drape.
Store in a soft pouch. Avoid water and perfume. Restring every 2-5 years. Share your finished necklace online. Friends love DIY stories.
Spot and Fix Common Restringing Goofs Quickly
Uneven knots mean redo that section. Too tight? Unknot and loosen. Lost a pearl? Keep extras handy.
Thread tangles happen. Straighten with tweezers. These quick fixes keep you on track.
You just revived a cherished necklace without pro help. Savings add up, and skills stick with you. Grab your broken strand today. Try these steps and see results.
Share photos in the comments. Did it turn out perfect? Subscribe for more jewelry DIYs like cleaning pearls. Everyone starts as a beginner. Yours looks great now.