You finish a beautiful quilt block. Then you flip it over. A pesky knot pokes through the fabric. It ruins the clean look you worked hard for.
Knot covers fix that fast. These small fabric patches hide thread ends perfectly. They save time. You skip ripping seams. Plus, they add strength to your project.
This method shines in quilting, applique, and repairs. Beginners get pro results. Follow the steps below. You’ll conceal those ends with ease.
What Knot Covers Are and Why They Beat Other Hiding Methods
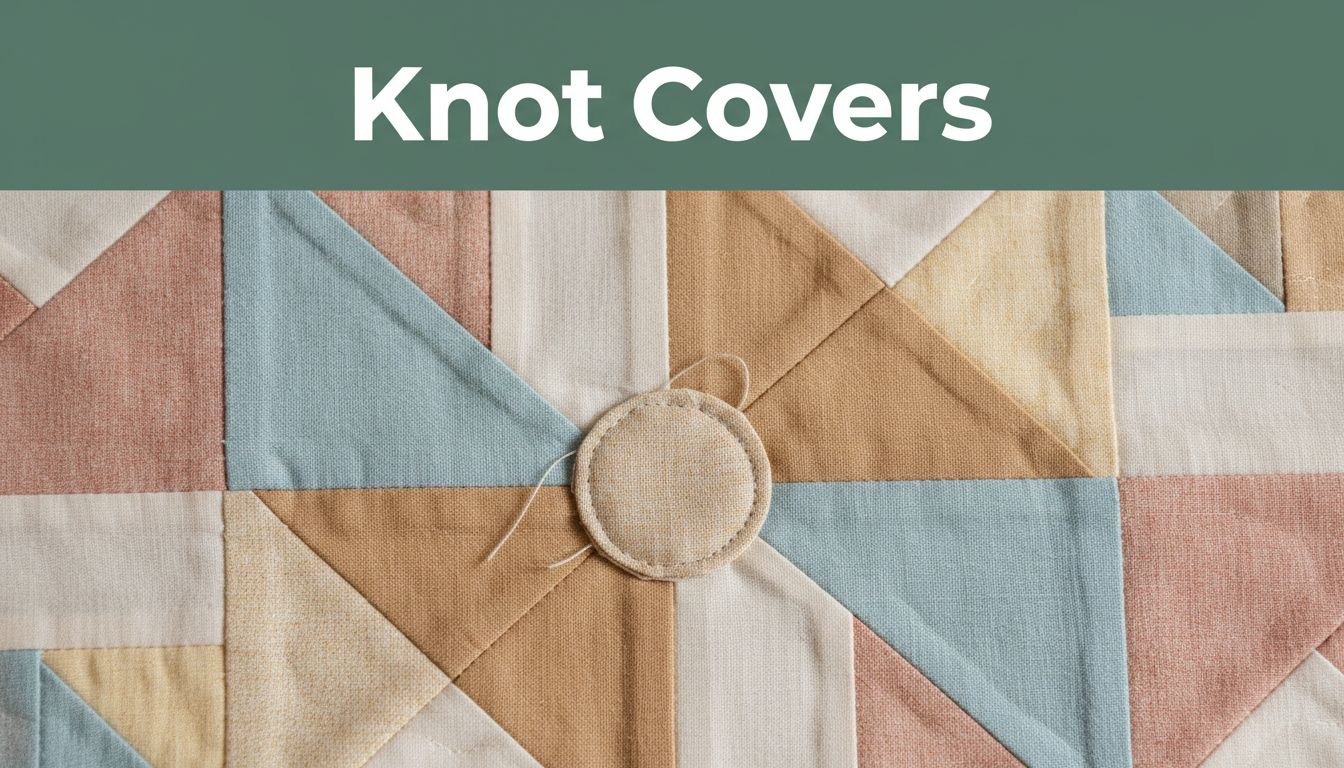
Knot covers work as tiny fabric discs or shapes. You place them over trimmed knots. Glue or sew them down. Then trim the edges close. The knot vanishes under matching fabric.
Other methods fall short. Burying threads takes forever. You weave a needle back and forth. It risks pulling stitches loose. Fray check stiffens fabric. It yellows over time.
Knot covers win because they stay put. They cover bulky knots fully. No puckers form. For more on burying threads as an alternative, check this quilting basics guide. Fusible types use iron-on adhesive. Sew-on versions need a quick stitch.
Choose cotton or felt scraps. They blend with most projects. Use them on machine applique backs. Hand quilting loves them too. Garment repairs benefit from the extra hold. Strength increases because the cover reinforces weak spots.
In short, knot covers speed your workflow. Results look polished from both sides.
Gather These Simple Supplies for Quick Knot Covering
Start with scraps from your project. Match the color and weight exactly. This keeps covers invisible.
Grab fusible web sheets. They have adhesive backing. Or use iron-on adhesive dots. Sharp fabric scissors cut clean edges. Fine tweezers handle tiny threads.
Add a pressing cloth. It protects your iron and fabric. Set the iron to no steam. Medium heat works best. Matching thread helps for sew-on covers.
Optionals make life easier. A coin or circle template guides cuts. Applique pins hold pieces steady.
You find most items in your sewing kit. Check scrap bins first. Dollar stores stock fusible web cheap.
Here’s a quick rundown:
- Fabric scraps: Match your project.
- Fusible web: For no-sew adhesion.
- Scissors and tweezers: Precision tools.
- Iron and cloth: Secure the bond.
These basics cost little. They handle dozens of knots.
Follow These Easy Steps to Hide Thread Ends Like a Pro
Anyone can master this in under two minutes per knot. Prep the area first. Cut the cover next. Fuse it down. Trim for finish.
Pressure matters. Firm presses lock it in. Test on scraps to build skill.
Step 1: Trim Threads and Isolate the Knot
Snip thread tails close to fabric. Use sharp scissors or thread snips. Leave about 1/8 inch.
Tweezers pull the knot taut if loose. Finger press nearby fabric flat. This isolates the spot.
Cut too close? The knot loosens. Aim for a clean base every time.
Step 2: Cut Your Knot Cover to the Perfect Size
Measure the knot. Add 1/4 inch all around. Trace a circle with a template or coin.
Fuse web to scrap back first. Trace and cut with fresh scissors. Ovals fit odd shapes better.
Match grain direction. It adds stability. Sharp cuts prevent fraying.
Step 3: Position and Fuse the Cover Securely
Center the cover over the knot. Right side faces out. Tweezers nudge it perfect.
Place pressing cloth on top. Iron medium heat for 10-15 seconds. Press firm, no sliding.
Tug gently to check. It holds tight. For sew-on, pin and zigzag stitch narrow.
Synthetics need lower heat. Avoid scorch marks.
Step 4: Finish Edges for a Seamless Look
Cool fully first. Trim edges close. Leave a hair’s width allowance.
Topstitch if needed. Or quilt over it. Rub test ensures it stays.
Now it’s truly gone. Flip and admire.
Smart Tips to Avoid Mistakes and Get Pro Results
Wrong size covers show edges. Too small misses the knot. Too big bulges. Measure twice.
Heat causes shine on dark fabrics. Use dry iron always. Practice saves fabric.
Batch multiple knots. Work assembly-line style. Saves iron warm-up time.
Color match with neutrals if unsure. They blend anywhere. Wash test first on scraps.
Advanced sewers embroider covers. Add subtle designs. For fusible web tips, see this sewing resource.
Stabilizer under thin spots prevents pull. Experiment freely.
Common Errors and How to Dodge Them
Steam puckers covers. Switch to dry heat.
Shifting happens without pins. Finger press first.
Edges peek if not trimmed cool. Wait five minutes.
Practice on junk fabric. Fix issues fast.
Extra Tricks for Designer-Level Finishes
Layer two covers for thick knots. Top one hides the first.
Add tiny beads underneath. Texture boosts without sight.
Use patterned scraps. Fun peeks through quilts.
Set machine to 1.5mm zigzag. It secures sew-ons neat.
Project Ideas to Practice and Show Off Knot Covers
Try a quilt block applique first. Hide back knots quick. See pro fronts and backs.
Repair pillow seams. Knots vanish under covers. Toss it in wash worry-free.
Baby blanket edges love this. Soft felt covers hold up.
Fix clothing hems. No unpicking needed. Strengthens wear spots.
Make a tote bag strap. Multiple knots? Batch cover them. Instant upgrade.

Share your before-and-after photos. Tag friends for tips.
These projects build skill. Results impress every time. For project inspiration, explore applique quilting ideas.
Ready for Flawless Finishes Every Time
Knot covers transform messy backs to smooth pros. You save time and boost durability.
Try them on your next quilt or repair. Note how fast it goes.
Comment your results below. Pin this for later. Subscribe for more sewing wins.
Your projects deserve that perfect touch. Go create.