Picture this. You spend hours crafting a stunning necklace with shimmering beads and silky cord. Then one sloppy end knot unravels it all during wear. The whole piece looks homemade in the worst way. Frustrating, right?
Bead tips and calottes fix that fast. These small metal cones hide knots and link to clasps. They give your jewelry a clean, store-bought finish. No more frayed threads or itchy bumps against skin. Your designs drape smoothly and last longer.
Silk, nylon, or leather cords work best with them. They prevent pulls and add polish. Beginners love the quick pro look. Experts use them for multi-strand pieces too.
In this guide, you’ll get the tools list first. Then step-by-step instructions with sizes and glue tips. We’ll cover mistakes like loose knots and bulky fits. Plus pro tricks to wow buyers. Ready to make your jewelry gift-ready? Let’s start with basics.
What Exactly Are Bead Tips and Calottes and Why Bother?
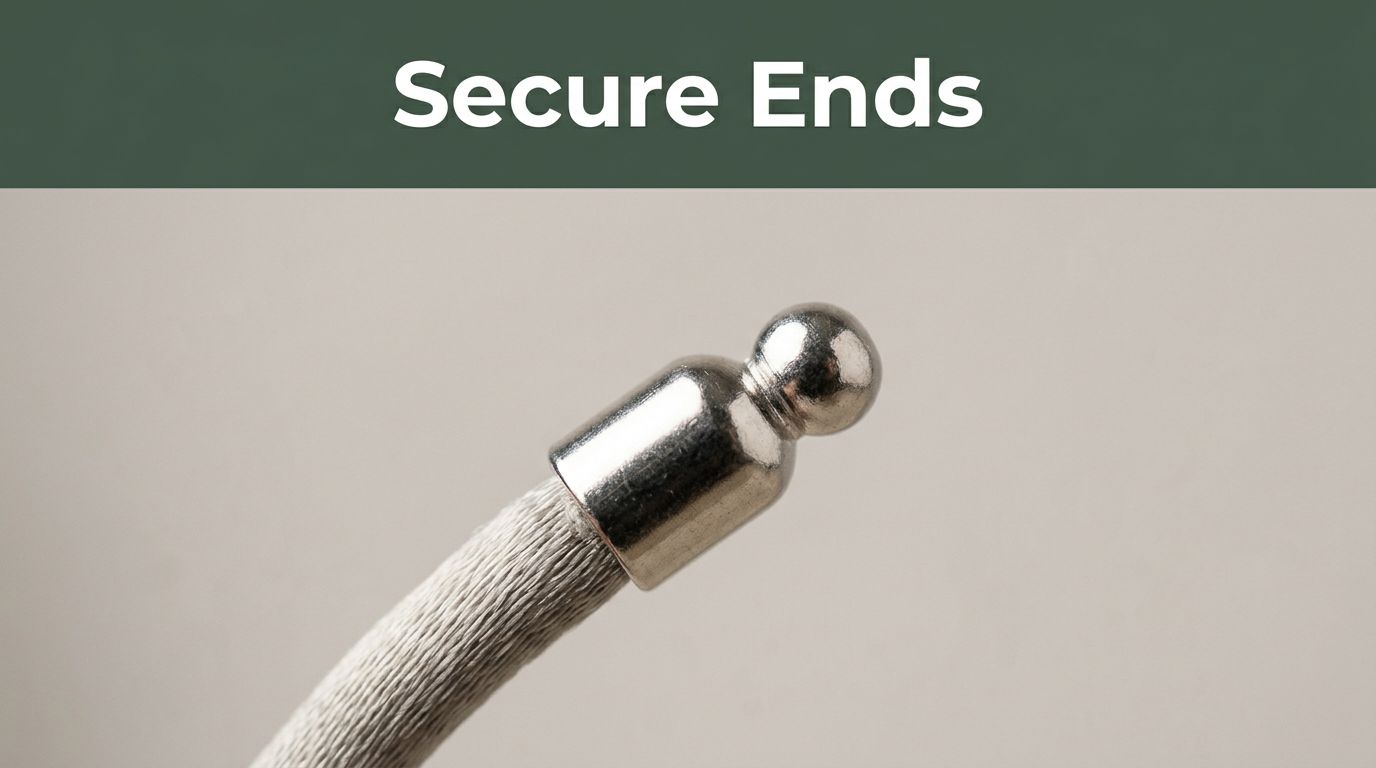
Bead tips are simple cup-shaped findings. Calottes look fancier with detailed edges. Both have a tiny hole for cord and a loop for clasps. You slide cord inside, knot it, and close the cone.
They encase the knot completely. This hides mess from view. Silk cord stays secure without fraying over time. Nylon or leather gets the same smooth end.
Raw knots fail fast. They itch necks or wrists. Threads pull loose with tugs. Bead tips beat that every time. Your necklace hangs elegant. Bracelets feel comfy all day.
Think of it like a scrunchie. A messy ponytail hides inside for a chic updo. Calottes do the same for cord ends. No one sees the knot. Everyone admires the flow.
For necklaces, pick slim ones under 2mm. Bracelets need sturdier loops. Match metal to your clasp: gold with gold, silver with silver. Results look custom-made.
Crafters swear by them for sales. Pieces fetch higher prices. Durability builds repeat buyers. Still wonder why bother? Your time deserves pro finishes.
Stock Up on These Must-Have Tools and Supplies
Gather these before you start. Each plays a key role. Skip one, and connections weaken.
- Chain-nose pliers: Close calottes gently. Fine tips grip without scratches. Get them with cushioned handles for comfort.
- Flat-nose pliers (optional): Hold loops steady. Useful for stubborn clasps.
- Hypo cement or G-S Hypo glue: Secures knots without mess. Dries clear and flexible. Avoid super glue; it brittles.
- Sharp flush-cut scissors: Trim tails close. Regular ones leave ragged ends.
- Bead tips or calottes: Buy packs in sizes 2-4mm. Match your cord color: silver, gold, black.
- Your cord or thread: Silk or nylon coated for shine.
- Matching clasp: Lobster or toggle style fits most.
Shop craft stores like Michaels for basics. Online sites offer bulk deals. Expect $10-20 total for starters.
Work in ventilated spots. Glue fumes irritate eyes. Wear grips on pliers to save fingers. Test supplies on scraps first. Now you’re set for success.
Follow These Easy Steps for a Rock-Solid Connection
Master this in under 15 minutes per end. Practice twice for speed. Results hold up to daily wear.
Size matters first. Then knot, glue, trim, close, and link. Each step builds strength.
Step 1: Pick the Perfect Size Match for Your Cord
Measure cord diameter with calipers or a ruler. Common threads fit 2-3mm holes. Too big? The cone bulges ugly.
Too small? Knot slips out. Test by threading a scrap. Snug fit wins. Buy extras in 1mm, 2mm, 3mm.
Stock silver and gold tones. This matches most designs.
Step 2: Thread, Knot, and Position Inside the Cone
Slide cord end through the hole. Pull to leave a 1/4-inch tail inside. Tie an overhand knot, then a surgeon’s knot on top.
Pull tight against the cone’s inner top. The knot seats snug. Trim tail later. Tug hard to check hold.
Step 3: Seal It with Jewelry Glue
Dab a pea-sized drop on the knot only. Use the applicator tip. Wipe excess with a toothpick.
Prop the cone open with a bead. Dry 5-10 minutes. Glue stays flexible for cord flex.
Step 4: Snip Excess and Close with Pliers
Cut the tail flush with scissors. Position chain-nose pliers on sides. Squeeze evenly.
Avoid the loop end. Check for gaps. Smooth shape matters.
Step 5: Link to Your Clasp for Completion
Open the loop with pliers. Slip on your clasp ring. Close tight with a second squeeze.
Test by pulling 10 times. No give means success. Repeat on other end.
Dodge These Sneaky Mistakes for Flawless Results
Even pros slip up. Bulky ends kill sales. Loose knots frustrate wearers. Spot these early.
Oversized calottes look puffy. Skimpy glue lets slips happen. Over-squeezing dents metal. Mismatched tones clash. Wet trimming pulls glue out.
Fix with practice and checks. Your pieces shine.
When Your Knot Slips or Comes Loose
Tension fails first. Retie with surgeon’s knot. Add extra glue dot. Dry fully before tests.
Prevent by pulling hard post-knot. Scrap cord saves time. One crafter lost a sale to this; now she double-checks.
Avoid Bulky or Lumpy Finishes
Wrong size causes lumps. Measure twice. Trim tails skin-close.
Use sharp scissors always. Smooth results turn hobbies pro.
Pro Tricks to Elevate Your Jewelry Game
Practice on scrap cord daily. Builds muscle memory fast.
Color-match metals to beads. Gold calottes pair with warm pearls. Silver suits cool crystals.
Rub beeswax on cord ends. Threads glide easy through holes.
Double calottes for thick cords. Layer for extra hold.
Polish closed ones with microfiber cloth. Shine boosts value.
For multi-strands, group cords before knotting. Even finishes impress.
These tweaks make pieces gallery-worthy. Gifts wow recipients. Sell confidence grows.
Your designs now rival boutiques. Keep experimenting.
Turn Messy Ends into Pro Finishes Today
Secure bead tips right, and knots vanish. Professional connections last. No bulges, no slips.
Grab pliers and glue now. Try on your next project. See the difference instantly.
Share your before-and-after photos below. What cord type trips you up? Subscribe for clasp tips next. Your jewelry deserves that polished edge. Craft on.