You string beads for hours. Then you hold up the necklace. The pattern looks off. Beads crowd one side. The curve feels wrong. Frustration hits hard.
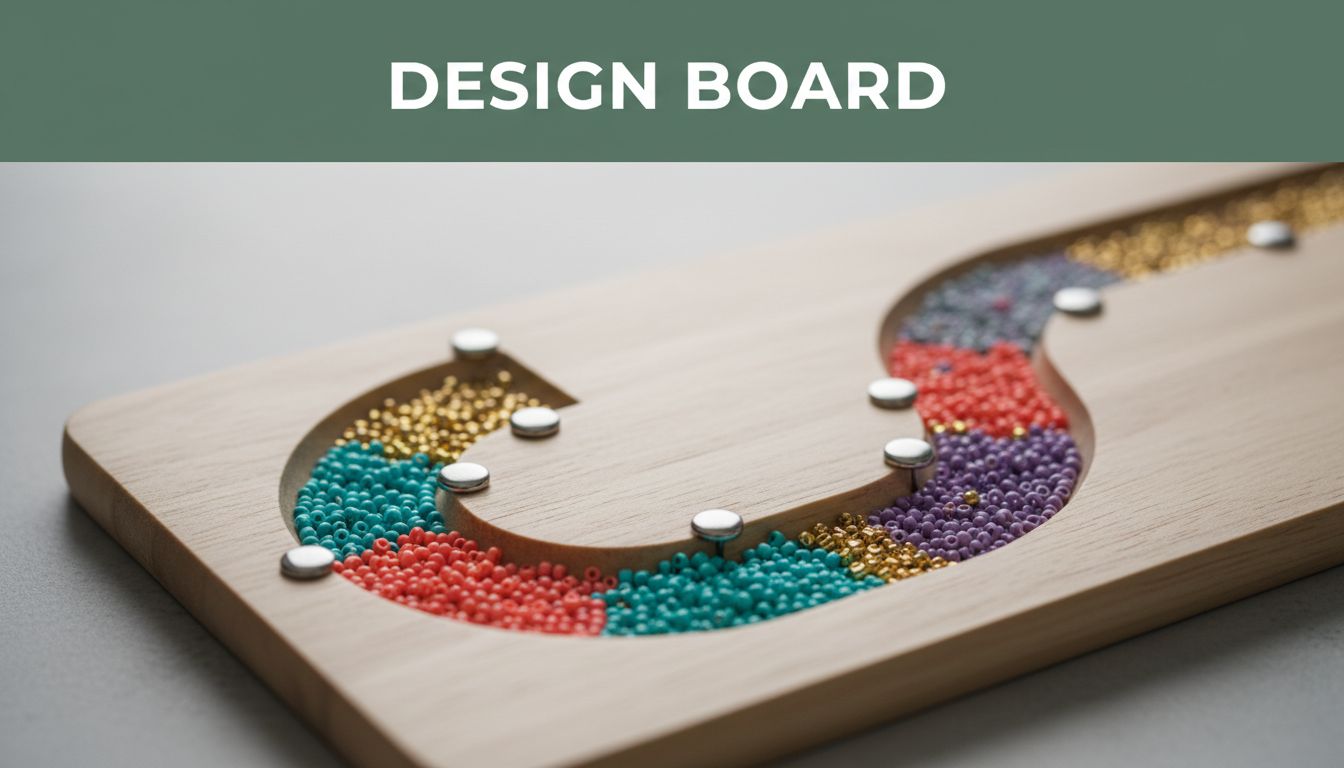
A bead design board solves this fast. This simple tool has a curved groove that matches necklace shapes. Magnets hold beads steady. You plan layouts without committing to stringing. Rearrange freely. See symmetry right away.
You’ll save time and beads. Test colors and flows before the final piece. This post covers why it works, how to pick one, step-by-step planning, and pro tips. Beginners and pros both love it. Ready to nail your next design on the first try?
Why a Bead Design Board Transforms Your Beading Projects
Picture a flat board with a U-shaped groove. It mimics how a necklace drapes around your neck. Most boards use magnets to grip beads. Others rely on foam or grooves alone.
Beadalon makes popular magnetic ones. Foam boards suit light beads. You can even DIY with felt and a curve template. Sizes range from 7 inches for bracelets to 19 inches for full necklaces.
Symmetry stands out first. Place beads and spot imbalances quick. Colors pop or clash in context. Measure exact lengths with built-in rulers. Waste drops because you test before stringing.
Beaders share stories online. One saved a whole strand of rare pearls. Another prototyped ten bracelet ideas in an hour. Speed boosts creativity.
Materials matter. Magnetic boards handle crystals best. Foam works for delicate seed beads. Here’s a quick comparison:
| Material | Pros | Cons |
|---|---|---|
| Magnetic | Holds heavy beads; reusable | Magnets wear over time |
| Foam | Gentle on finishes; cheap | Beads shift easily |
| DIY | Custom shapes; low cost | Less precise curve |
Pick based on your beads. In short, this tool turns guesswork into precision. Your projects finish faster and look pro.
Pick the Perfect Bead Design Board to Match Your Style
Start with your projects. Bracelets need short boards. Long strands call for bigger ones. Check portability too. You want it stable but easy to store.
Budget plays a role. Basic models cost under $20. Premium ones like Beadalon Port-O-Design run $25 to $40. They come in 7, 12, 16, and 19-inch sizes. Durability shines in these.
Look for non-slip bases. Printed measurements help. Storage spots for tools add value. Strong magnets grip gemstones without slipping.
Buy from craft stores or online. Read reviews for magnet strength. Here’s a buyer checklist:
- Matches your common lengths.
- Fits your bead weights.
- Cleans up easy.
- Stays put on tables.
Match Board Size to Your Favorite Jewelry Lengths
Bracelets fit 7 to 8 inches. Anklets match that. Chokers span 12 to 16 inches. Princess necklaces hit 19 inches clasp to clasp.
Measure your patterns end to end. Include clasp space. A 16-inch board handles most pieces. It gives room to experiment.
Key Features That Make Designing a Breeze
Rulers run along the groove. Color sections guide symmetry. Strong magnets secure heavy beads. Stackable designs save space.
These extras speed your work. You focus on design, not fussing with shifts.
Plan Stunning Layouts Step by Step on Your Design Board
Prep keeps things smooth. Follow these steps. You’ll build confidence fast.
Gather Beads, Tools, and Set Up Your Board
Sort beads into trays. Grab tweezers for small ones. Add a bead scoop and soft cloth. Set up on a flat table with bright light.
Place beads close by. Wipe the board clean. Magnets work best on smooth surfaces.
Place Focal Points and Build Your Pattern Outward
Start in the center. Drop your largest bead there. It’s your star.
Add spacers on both sides. Keep sizes equal. Build rhythm with repeats. Alternate shapes for flow. Big, small, big pulls the eye.
Symmetry feels natural. Test one side, mirror the other.
Achieve Perfect Symmetry and Flow with Easy Adjustments
Flip the board. Check the mirror view. Slide beads to test drape.
The curve shows real wear. Gaps appear. Flows emerge. Adjust until it sings.
Measure, Tweak, and Lock in Your Final Design
Read the ruler for total length. Snap a photo. Jot notes on paper.
Tweak colors or spacing now. Once set, move to stringing. No regrets.
These steps take minutes. Practice builds speed. Your layouts shine every time.
Pro Tips and Tricks to Elevate Every Bead Layout
Layer strands on one board. Mix metals with glass. Boho calls for earthy tones. Minimalist sticks to two colors.
Use toothpicks for tiny beads. Photograph every version. Record what works.
Try asymmetrical earrings. Multi-strand bracelets add fun.
Clean magnets with a soft brush. Store flat to avoid warps.
Spark Creativity with Color and Texture Combos
Analogous colors blend smooth, like blues and greens. Complementary pairs pop, reds against green.
Layer matte with shiny. Rough stones next to polished. Balance keeps it fresh.
Avoid Beginner Mistakes for Pro-Level Results
Leave clasp room. Don’t overcrowd focals. Test heavy beads on strong magnets first.
Measure full length always. Fit check each bead. Fixes save headaches.
Ready to Design Without the Guesswork?
Bead design boards cut redo’s. You see curves, symmetry, and flow upfront. Beautiful jewelry comes easier.
Grab one today. Plan your next necklace. Share your layout photo in the comments. What will you make first?
Your perfect piece starts here. Happy beading.